Hey everyone,
I just wanted to take a little time today to share a super easy way to fix minor repairs on portraits that will work on any version of photoshop or photoshop elements; especially versions of photoshop that don't include layer masks. I like to call this technique, a "photoshop sandwich", because you create layers on either side of a correction layer (the sandwich), then erase the top layer with very low opasity for a correction to the image problem area. I know it sound kinda confusing, but here are two examples of how I use the "photoshop sandwich."
If I have a portrait that has problem skin or I want to smooth the skin out some, I would duplicate the layer twice by using cntl J. Now I have three layers, a background and two layer on top. I would select the middle of the three layers from the layers pallette and from the filter menu, I would select the gussian blur and set the amount equal to about the megapixels of my camera. ie, 8 for a Canon 30d. I then select the add noise command and select a small amount of noise to give the blurred layer a little texture, probably around 2 or 3. Now I select the topmost layer of the three, or the top slice of the photoshop sandwich. I then go to the eraser tool and use a soft feather brush and set the eraser opasity to around 30% and flow to around 40-50%. Now on the top layer, I select the areas of the skin that need smoothing and I work with the eraser tool on those areas to slowly reveal the blurred portion of the image layer below. This technique really helps with skin but doesn't change the overall tonality or structure such as the clone or healing brush tools.
One more example with the same technique. I have a portrait that has way too much redness in the subjects skintone, but the rest of the images color appears good. I would duplicate the layer twice and then select the middle layer from the layers pallette and select the saturation item from the adjustments menu. I would select the color red from the pulldown and move the slider to -10 or until the red is better, again, all these adjustments are on the middle layer. Now as before, you would select the topmost layer and select the eraser tool with the eraser opasity around 30% and flow to around 40-50%, then work on the areas of the image that were way too red. As you erase the topmost layer at the red areas, you should see big improvements as your middle layer begins to show slightly through and your image should be significantly improved.
That technique can be used on all versions of photoshop and acts very similary to layer masks without actually have layer mask in your photoshop version, so give it a whirl and if you like the technique, pass it along to others that may benefit from this tip also.
Subscribe to:
Post Comments (Atom)
About Me (-m)

- Mark Peeler
- Diamondhead, MS
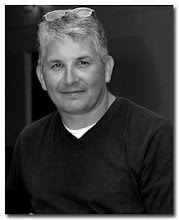
- Mark Peeler, a pretty abnormal guy, photographer, husband, father, doglover, America's Most Boring Blogger Championship contestant, member of the "Jeep Lovers Foundation", the man who's been pee'd on by my son and my dog both! A true southerner with "Larry the Cable Guy" class.
1 comment:
this is really cool. it works very well!
Post a Comment